|
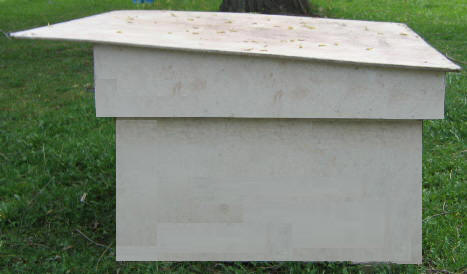
This unique, insulated Dog House Plan is only one
design of many dog houses. It is designed to provide an insulated, warm, dry,
comfortable dog house for your dog; plus it is designed to be
easy to clean! If you would like to replicate it,
follow the
directions below.
Material List:
2 x 6: 12'
2 x 4: 72'
1/4" exterior plywood: 4 sheets
@ 4'x8'
1 1/2" Styrofoam Insulation:
2 sheets @ 4' x 8'
16 Penny framing nails, 2 1/2" and 1 1/4" deck
screws, exterior caulk.

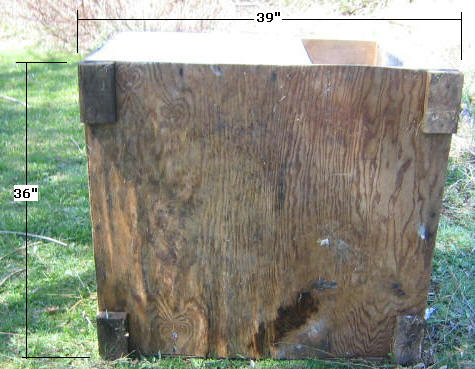
Step 1, Build the Base: -
Select the 1/4" Exterior Plywood; cut two sheet: 36" x 39".
Select 2 x 4; cut 2 lengths @ 39"; cut 3 lengths @ 29".
Layout the pieces per the diagram below:
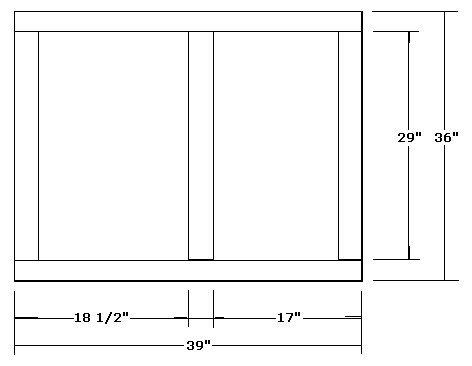
Layout the 2 x 4's flat on top of
the Base Panels to confirm size and fit; Toenail or use a
Pocket Jig to connect the 2 x 4's; this frame will be
sandwiched between the two Base Panels. Select one of
the Base panels and screw it to the frame; flip it over.
Select the 1 1/2" Styrofoam insulation and cut the two
pieces; 17 x 29 and 18 1/2" x 29; set these pieces in
place. Select the second Base Panel and secure in to
the Base Frame; this will be the insulated floor panel.
Select the 2 x 4 and crosscut four pieces @ 8"; these will
be the four feet to keep the base off the ground; nail the
four feet in place. The insulated base is complete.
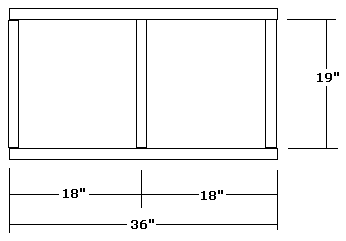
Step 2, Build the two Side Walls:
- Select the 2 x 4, cut the following lengths: 4 @
36"; 6 @ 19". Layout the pieces for the two walls per
the diagram above. Nail the pieces together to form
the two frames for the side walls. Select the 1/4"
plywood; cut two rectangles for the interior wall panels for
the side frames, 36 x 22. Screw one side panel to each
side frame as shown below.
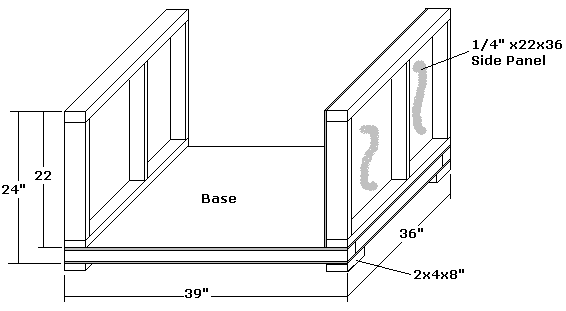
After the side panels have been
screwed to the side frames, secure the side panels/frames to
the Base with 2 3/4" deck screws; all edges should be flush.
Step 3, Build the Back Wall: -
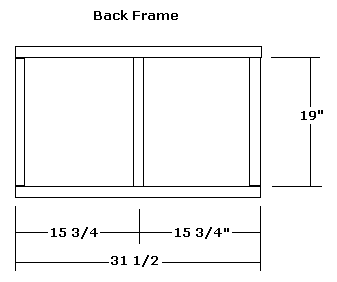
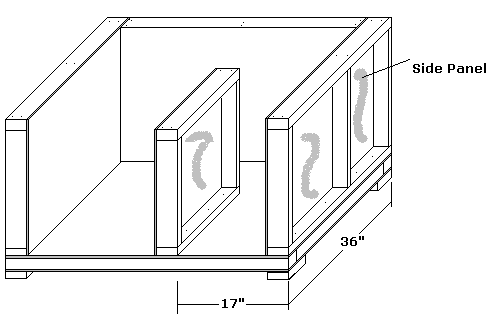
Select the 2 x 4 and cut the following lengths: Two
pieces @ 31 1/2"; Three pieces @ 19". Layout the pieces per
the diagram above. Nail the pieces together to form
the frame for the back wall. Select the 1/4" plywood;
cut a rectangle for the interior wall panel for the back
frame, 31 1/2" x 22. Screw the back panel to the back
frame.
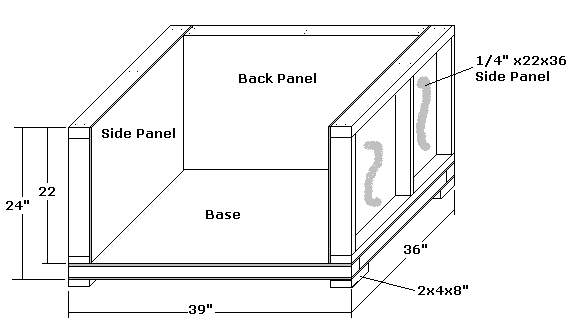
After the back panel has been
screwed to the back frame, secure the back panel/frame to
the Base and side walls with 2 3/4" deck screws; all edges
should be flush.
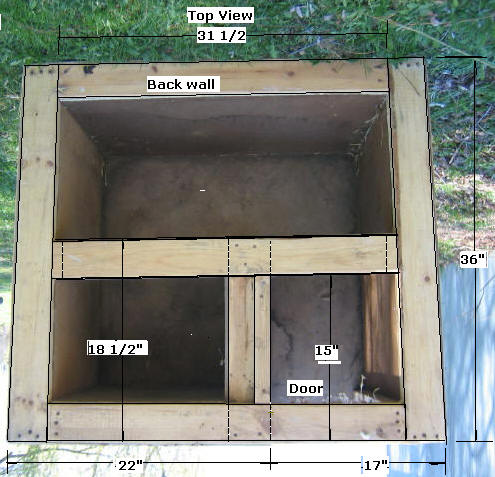
Step 4, Build the Entrance-Divider Wall:-
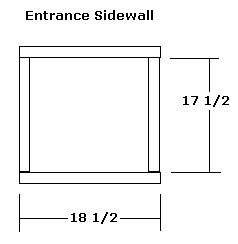
Select the 2 x 4 and cut the following lengths: Two
pieces @ 18 1/2"; Two pieces @ 17 /1/2". Layout the pieces
per the diagram above. Nail the pieces together to
form the frame for the Entrance Sidewall. Select the
1/4" plywood; cut a rectangle for the interior wall panel
for the Sidewall frame, 18 1/2" x 20 1/2". Screw the
wall panel to the Entrance-Divider frame. Screw this
wall frame in place to the base, 17" from the right side
edge.
Step 5, Build the Front Wall:
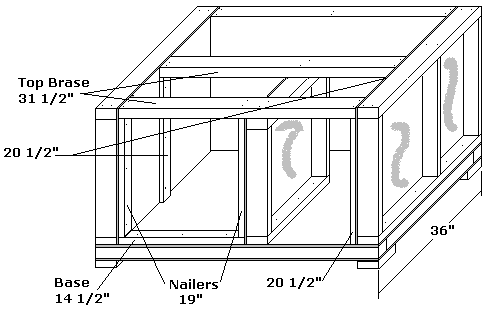
Select the 2 x 4 and cut the following lengths: One
piece/Base @ 14 1/2"; Two pieces/Nailers @ 19"; Three
pieces/Nailers @ 20 /1/2"; Two pieces/Top Braces @ 31 1/2".
Layout the pieces per the diagram above. Nail the 14
1/2" Base piece to the floor between the two wall sections.
Screw the 19" Nailers to the wall sections. Screw the
20 1/2" Nailers to the side wall panels. Nail the two
31 1/2" Top Braces to the Nailers connecting the three wall
sections.
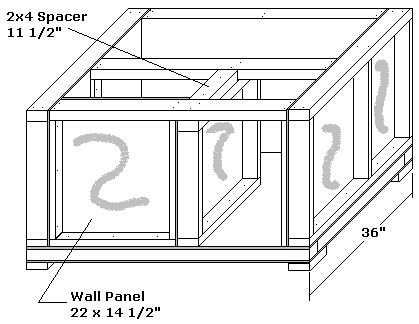
Select the 1/4" plywood and cut the
interior, front wall panel, 22 x 14 1/2" and screw it into
position. Select the 2 x 4 and cut it to 11 1/2" for
the Spacer for the top of the Divider-Wall.
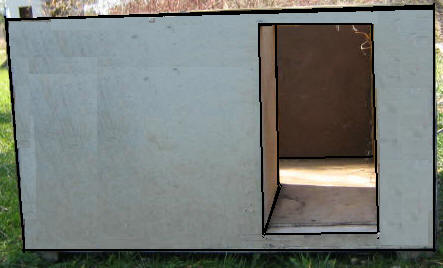
Step 6, Apply the Wall Insulation
and Exterior
Siding: Fill all the open wall cavities with 1 1/2"
Styrofoam insulation (Double the thickness to 3").
Select the 1/4" plywood; rip it to 22 1/4"; crosscut two
pieces to 36" and attach them to the sides; flush on top
with a 1/4@ overhang at the bottom. Crosscut two
pieces to 39 1/2" for the front and back and attach them
(cut out the door before attaching the front). Cut out
a rectangle for the remaining divider-wall, 18 1/2 x 20 1/2"
and attach it. The bottom portion of your insulated
dog house is complete.
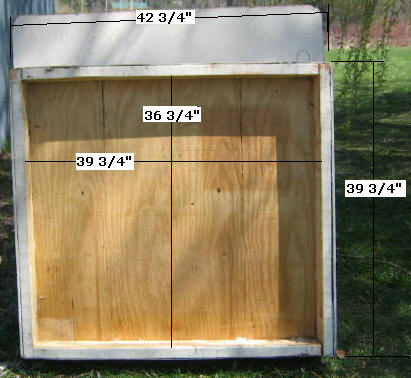
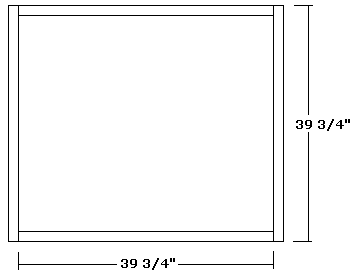
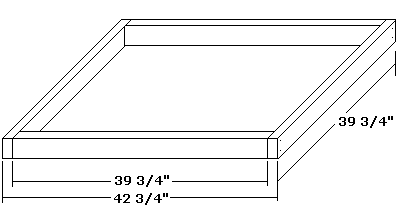
Step 7, Build the Roof Frame:Select
the 2 x 4 and cut the following lengths: Four
pieces @ 39 3/4". Layout the pieces per the diagram above.
Nail the pieces together to form the frame for the Roof.
Select the 1/4" plywood; cut a rectangle for the ceiling, 39
3/4" x 42 3/4". Screw the lid panel to the frame.
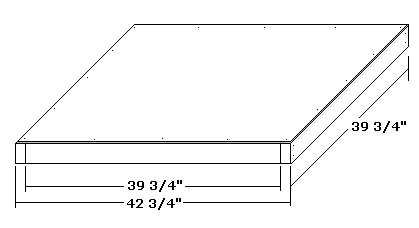
At this point, confirm that the lid
fits over the completed base.
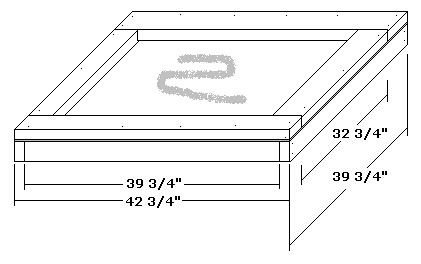
Select the 2 x 4; cut
the following pieces: two @ 42 3/4" and two @ 32 3/4".
Nail them in place per the diagram above. Select the 1
1/2" insulation and fill the area on the top of the lid
surface between the 2 x 4's.
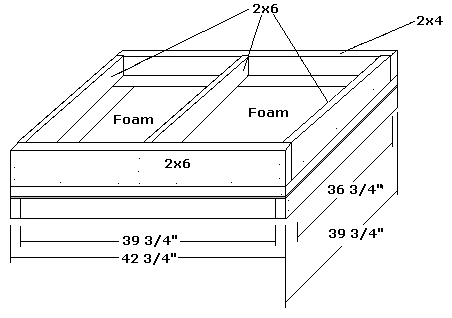
Step 8, Build the Roof:-
Select the 2 x 4 and cut the following length:
One piece @ 42 3/4". Select the 2 x 6 and cut
the following lengths: One piece @ 42 3/4";
Three pieces @ 36 3/4".
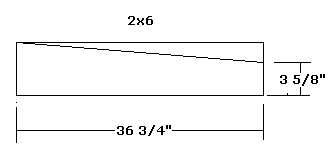
Select the three 2x6 pieces @ 36
3/4"; at one/right end of each, measure up 3 5/8" and make a
mark; using a straight edge, connect this mark with the top
left edge and scribe a line on each board. Cut along
the line to produce the three ridge pieces for the roof.
Layout the pieces per the
diagram above. Nail the pieces together to form the
frame for the roof and place this frame on top of the lid as
shown in the graphic; from the inside, toenail this frame to
the existing lid or use "L-Brackets" to secure the frame to
the lid. If you have some loose insulating material
you may wish to add some at this point between the ridge
plates.
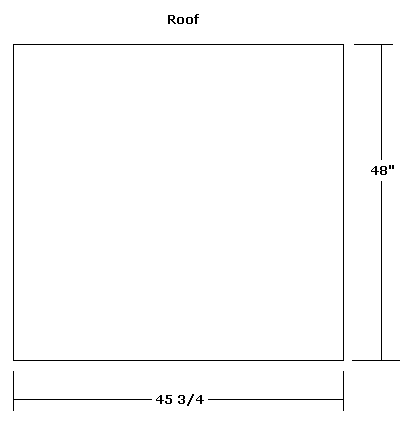
Select the 1/4" plywood; cut a
rectangle for the shed-type roof panel, 45 3/4" x 48".
Nail the roof panel to the roof ridge plates/frame.
Allow 1 1/2" to overhang the sides and back side.
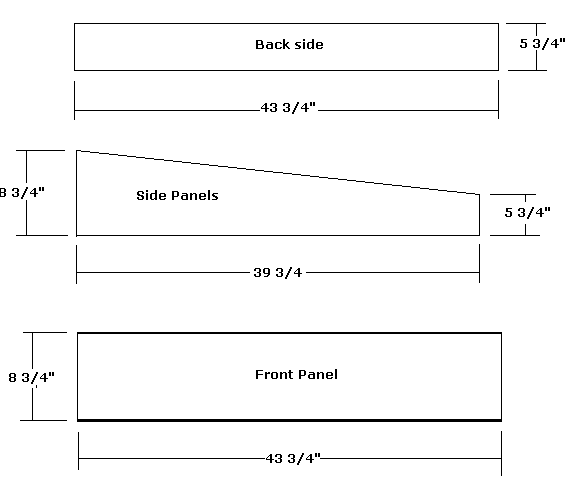
Step 9, Build the Roof Side Panels:-
Select the 1/4" plywood; cut the back, two sides, and
front panels to the dimensions indicated above.
Nail the side panels first; the top edge of each should
be touching the roof and the side edges flush/even.
Nail the back and front panels in place. Your insulated lid
is now complete.
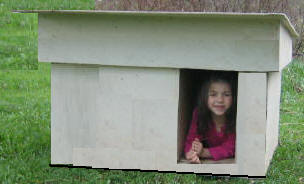
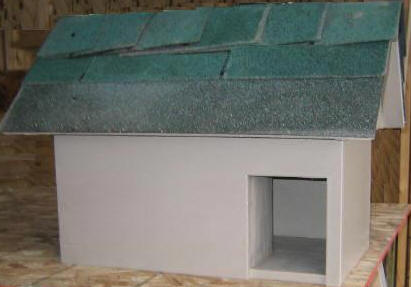
Your Insulated Dog House is now complete and
ready for painting or staining to suit your personal needs
after the materials have cured;
use an exterior, paintable caulk to fill all the nail/screw
holes and sand before you finish your house; also, caulk all
the seams, edges to keep it water tight. You can now
provide your best friend an insulated, dry, comfortable home
to avoid the elements. The removable top allows you
easy access to keep the place clean; enjoy.
Hope you
enjoy this plan; if you would like to see another free
design,
click here!
More FREE Plans!
Picnic Table Plans
Gun Rack Plans
Bookcase Plans
Bird Feeder
Boot Rack
Toy Box
|